
|
Crossing back into Europe the same day, I also joined a guided tour of
the Gallipoli battlefields, led by Ali, a former captain in the
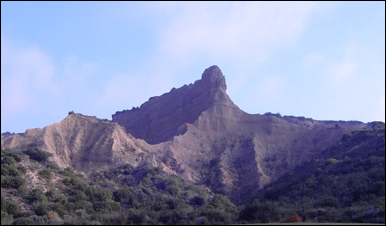
Turkish navy. The first two photos show the area of Anzac Cove, where
the Australian and New Zealand troops came ashore. The top image
shows the rugged terrain the troops had to scale before they could
engage the Turkish troops. It took too much time to climb the cliffs,
and the element of surprise was lost. (The interesting formation shown
here was called "the sphinx" by the troops, who had just come from
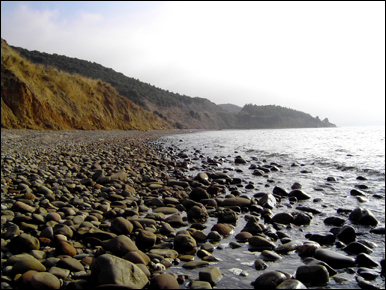
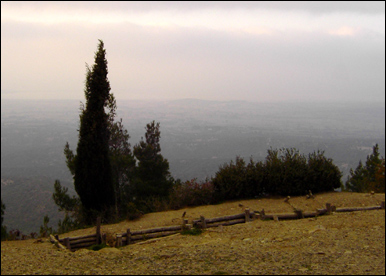
being stationed in Egypt.) The middle photo shows the rocky Anzac Cove. The Australians and New Zealanders lived in little burrows dug into the slopes just feet away from the water here. The only R&R available was swimming in the water; the Turkish gunners observed an informal agreement not to fire at unarmed swimmers. The bottom photo shows the New Zealand trenches at the high ground, called Chunuk Bayr. The allied lines were just 20 or 30 meters from the Turkish lines at the summit. Had the New Zealanders succeeded in taking and holding the high ground (they managed to hold onto it for only two days before being swept off), the Gallipoli campaign would have gone to the allies, since commanding the summit would have meant British artillery could command the entire peninsula, and the straits themselves. In the distance behind the trees is the little inlet called Suvla Bay, where the British troops came ashore late in the Gallipoli campaign. [ Next page ] |
|